
Short answer
How do I waterproof a bathroom? Finish and pressure-test the plumbing first. Then slope the floor to the drain, round the corners, seal the pipes and drain, and apply the coating in two coats, taking it at least 300 mm up the walls and 1.8 to 2.1 m in the shower area. Test it by ponding 50 mm of water for 48 hours before tiling. These steps come from a government draft guideline and IS 13182.
On this page (13)
- Where do bathrooms leak?
- What is the right order of work?
- How much slope does a bathroom floor need?
- How do I prepare the surface?
- How do I seal the pipes and the drain?
- How is the coating applied?
- How high should the waterproofing go up the walls?
- How do I do the ponding test?
- What goes on top of the coating?
- What mistakes should I avoid?
- Frequently asked questions
- Related guides
- Sources
A leaking bathroom shows up as damp patches on the ceiling of the room below, or on the wall next to it. By then the tiles are on, and the repair is messy and costly. The fix is to waterproof the bathroom properly before the tiles go on, and to test it. This page explains the steps, in order, using a government guideline and the Indian Standard for wet areas. It gives no prices.
Where do bathrooms leak?
IS 13182, the Indian Standard for waterproofing wet areas, lists the usual weak points:
- where pipes pass through the floor or the wall;
- the floor and the wall where the shower splashes;
- the door frame and the floor under it;
- around the wash basin;
- concealed pipes that leak at a joint;
- a floor that does not slope properly to the drain;
- tile joints and the cut-outs for branch pipes;
- the joint around the floor trap.
What is the right order of work?
- Finish all plumbing and sanitary work, and pressure-test the pipes, before any waterproofing starts. The government guideline says this plainly. IS 13182 also asks for concealed pipe joints to be tested before plastering.
- Slope the floor to the drain and prepare the surface.
- Seal the pipes and the drain.
- Apply the waterproofing coating.
- Let it cure, then do the ponding test.
- Only after the test passes, lay the protective screed and then the tiles.
How much slope does a bathroom floor need?
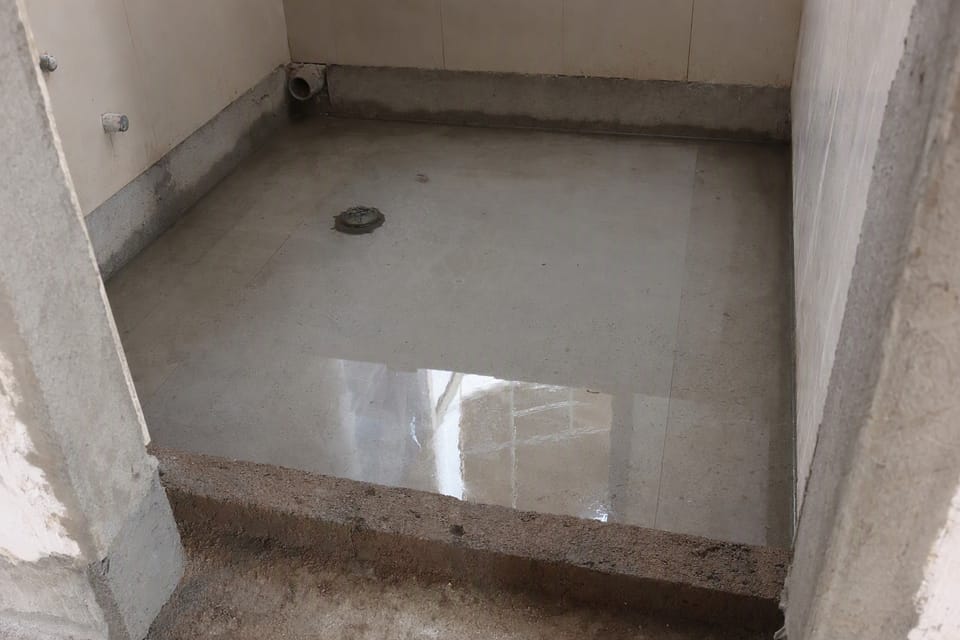
IS 13182 recommends a slope of at least 1 in 60 away from the door and towards the floor drain. It also recommends sinking the bathroom floor 25 mm below the floor outside. The standard calls these recommendations, and your engineer sets the final numbers. Check the slope before you apply the coating. A flat floor holds water, and standing water finds every weak spot.
How do I prepare the surface?
The government guideline, from the Construction Industry Development Council (CIDC), asks for the following. It is a draft guideline for new construction and not a BIS standard.
- The surface must be clean, reasonably dry and free of dirt, loose material, oil and grease.
- Fill any honeycombing in the concrete with polymer-modified grout.
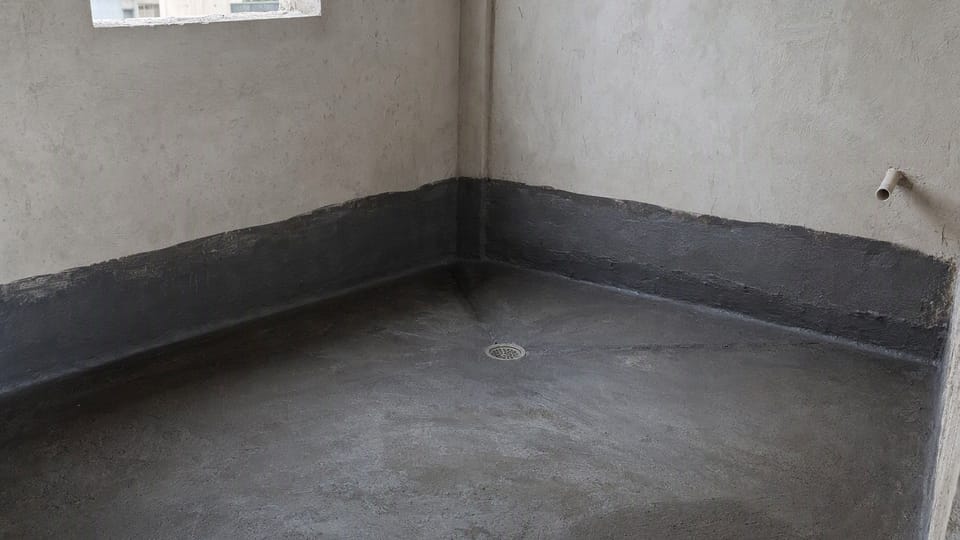
- Round the corners where the floor meets the wall with a 50 mm by 50 mm fillet of polymer-modified mortar. At a sunken floor or bath, use a 25 mm by 25 mm fillet.
- Build a 100 mm high concrete kerb at floor level along masonry walls, to stop damp moving into the dry rooms next door. The coating runs 150 mm into the dry area, over the kerb.
How do I seal the pipes and the drain?
The same guideline gives these steps:
- Wrap plastic pipes with double-sided bitumen tape where they pass through a wall or floor.
- Fill the gaps around the pipes, the outlets and the floor trap with free-flowing, non-shrink cement grout.
- Fill concealed pipelines with polymer-modified mortar.
- Take the coating at least 50 mm down inside the drain pipe at the floor outlet, before the floor trap and tiles are fixed.
How is the coating applied?
The guideline describes a polymer-modified cement coating. Other products have their own instructions, so follow the maker’s data sheet for any other system.
- Wet the surface so it is damp but not dripping.
- Brush or roll on a first coat, then let it dry for 4 to 6 hours.
- Put a strip of glass fibre mesh over the corner fillet where the floor meets the wall.
- Apply a second coat in the opposite direction. Together the coats make a membrane about 1 to 1.2 mm thick.
- Sprinkle coarse sand on the second coat while it is wet, to give the tile adhesive something to grip.
How high should the waterproofing go up the walls?
The guideline says to carry it at least 300 mm above the finished floor level. In the shower splash area of a bathroom or toilet, take it up to 1.8 to 2.1 metres. Do not copy the terrace figures from our terrace page. Those are for roofs, not bathrooms.
How do I do the ponding test?
The test follows the same pattern as for a terrace, with a shorter wait.
- Leave the coating to air-cure for 48 hours, or as the product’s data sheet says.
- Close all the outlets and fill the floor with water to 50 mm depth.
- Leave it for 48 hours.
- Check the ceiling and walls below and beside the bathroom. The test passes if there are no leaks or damp patches.
- Fix any leak and test again before you go further.
- Let the water out and open the outlets.
How you hold the water in, at the door and at the drain, is a job for your contractor. Ask your engineer how it is to be done. Neither IS 13182 nor IS 3067 has a ponding test. The 50 mm and 48 hours come from the government guideline, so a different product or engineer may ask for something else.
What goes on top of the coating?
After the test passes, the guideline asks for a protective screed of 10 mm of 1:4 cement and sand with a waterproofing compound. It should be at least 20 mm thick if drainage pipes run along the floor. Keep the floor sloping to the drain and take care not to damage the coating. Then lay the tiles.
What mistakes should I avoid?
- Waterproofing after the tiles are laid.
- A floor with no slope, or with a slope that falls away from the drain.
- No fillet at the floor and wall corner.
- Pipes and the floor trap not sealed.
- Skipping the ponding test to save a day or two.
- Tiling over a coating that has not cured.
Frequently asked questions
How high should bathroom waterproofing go on the walls?
At least 300 mm above the finished floor, and 1.8 to 2.1 m in the shower area, according to the government guideline.
How long should I do the ponding test?
48 hours at 50 mm of water, with the outlets closed, according to the same guideline. Leave the coating to cure first.
Does the floor need a slope?
Yes. IS 13182 recommends at least 1 in 60 towards the drain.
Can I waterproof after tiling?
Waterproofing is done before tiling. Fixing a leak under finished tiles usually means lifting them.
Do I need to waterproof the walls too?
Yes, up to the heights above. The shower area needs the highest coverage.
Related guides
- Terrace leakage and waterproofing: methods, slope and ponding test
- Hairline cracks in plaster: causes and what to do
- Stages of house construction in India: checklist and inspection points
This guide is general information. Read the disclaimer. The waterproofing system, its heights and its test for your bathroom are decided by your engineer and the product maker’s instructions.
Sources
- IS 13182:1991, Waterproofing and Damp-Proofing of Wet Areas in Building - Recommendations
- CIDC, Draft National Bidding Documents, Vol. 4 Technical Specifications: Waterproofing Guidelines for New Construction Projects (wet areas, section 2.0). A government draft guideline, not a BIS standard.
General information only. It is not a structural design or professional advice. Ask a licensed structural engineer or architect to check your plans and site.