
Short answer
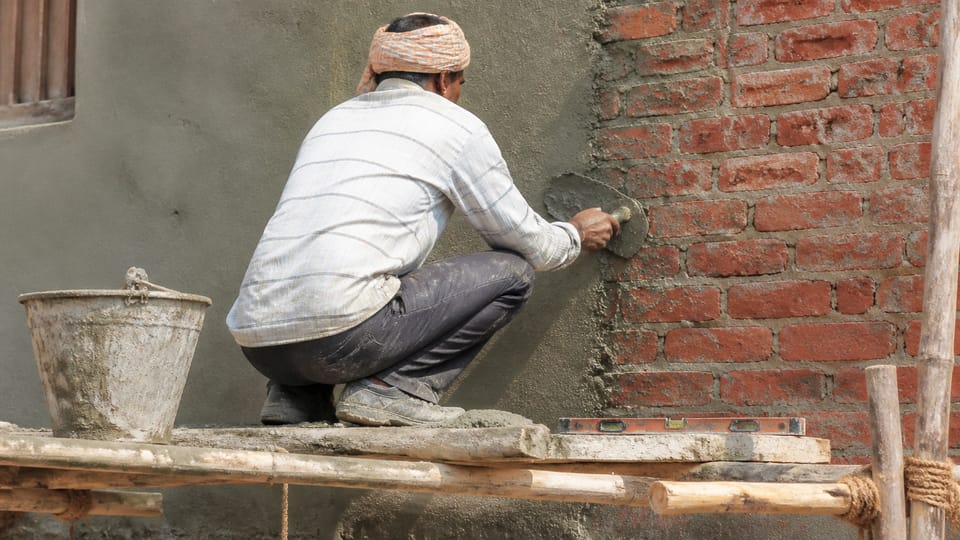
How do I plaster a wall step by step? Make sure the wall is sound, with holes and gaps filled and loose material brushed off. Key the surface so the plaster bonds. Wet the wall evenly until it is damp but not dripping. Apply a rough under coat and let it dry out, then apply the finish coat. Cure the plaster by keeping it damp. Your engineer or the mix table sets the mix and thickness; this page gives the steps, not the numbers.
On this page (13)
- What does IS 1661 cover?
- Step 1: check the wall before anything else
- Step 2: clean and key the surface
- Step 3: wet the wall, but do not soak it
- Step 4: apply the under coat
- Step 5: let the under coat dry out
- Step 6: apply the finish coat
- Step 7: cure the plaster
- What goes wrong, and what the owner can check
- What mistakes should I avoid?
- Frequently asked questions
- Related guides
- Sources
Plastering looks simple and fails in ways that are slow to show: a patch that sounds hollow, a crack that comes back, or a finish that flakes. Most of those failures start before the first trowel goes on. This page sets out the steps in order, the checks an owner can make, and the points the Indian plaster standard IS 1661 asks for. It gives no thickness, mix ratio, day count or soaking time. Those figures are on the linked pages, and your engineer or mason sets them for your wall.
What does IS 1661 cover?
IS 1661 is the Indian Standard code of practice for cement and cement-lime plaster finishes. It is current on the BIS listing. Its preparation rules are about the background, the wetting, the coats, the order of work, and the curing. It also describes what a finished surface should be, and the defects to look for.
Step 1: check the wall before anything else
Look at the wall and the work done before it. The standard asks for the surfaces to be checked before plastering, particularly for planeness and dryness (clause 9.4). Clause 12.2 says the masonry is allowed to dry out for a sufficient period. The CBRI practice list asks the same:
- All holes and gaps are filled.
- A gap between masonry and a beam is filled just before plastering.
- The wall has settled and dried out enough. The MPA data sheet notes that a wall plastered before it has dried can shrink and crack the plaster. Ask the mason when the wall was built.
- Door and window frames, and pipes or conduits that will sit in the wall, are fixed before plastering starts (IS 1661 clause 9.3).
Step 2: clean and key the surface
Brush off dust and loose material. IS 1661 says loose dust on masonry is removed by watering or brushing, that old crumbling plaster is cut out and patched, and that any algae is removed. A smooth background has to be made rough so that the plaster can grip. IS 1661 allows wire brushing for a surface that is not hard, and hacking or bush-hammering for a hard one. It also says the joints of brickwork are raked out for a key.
The standard gives the depths in its own clauses. This page does not repeat them. Ask your mason to show the key before the under coat goes on.
Step 3: wet the wall, but do not soak it
A dry absorbent wall pulls water out of the plaster and weakens it. Too much water also breaks the bond (clause 8.2.1). IS 1661 says the wall “shall not be soaked but only damped evenly,” and that any spots that dry are wetted again. The CBRI checklist asks for the wall to be wet before plastering.
The target is a wall that is damp all over and not dripping. Pour water on by hand or with a fog spray, and check that the water is not running off the wall.
Step 4: apply the under coat
The under coat, also called the rendering coat, goes directly onto the wall. IS 1661 says it is applied to the building surface, and that a floating coat may follow it in three-coat work. For brick and block walls the standard’s table (clause 7.2.2) gives two coats or one, and two is the ideal where practicable (clause 7.2.1).
Put the under coat on in one pass, press it well onto the wall, and bring it to a true and plumb surface. The CBRI checklist asks for the under coat to be left rough and furrowed, so that the finish coat will key onto it. The CBRI checklist asks for the under coat to be scratched with a comb or scratcher before it sets; IS 1661 clause 13.1.1 also asks for the rendering coat to be roughened. The MPA data sheet says a backing coat with no key is a common cause of bond loss.
Do not use a mix stronger than the wall can take. The data sheet notes that a strong coat on a weak background can crack and peel. The mix table is on the plaster quantity page.
Step 5: let the under coat dry out
IS 1661 says the second coat is applied after a suitable interval, and the MPA data sheet says each coat must dry enough for shrinkage to finish before the next. A finish coat put on a backing that is still wet, or has not dried out, can produce fine hair cracks. The standard says the first coat’s drying shrinkage should be materially complete before the next coat, and the surface kept damp (clause 8.5). The interval depends on the weather and the mix. Ask the mason how he judges it; do not guess a number.
Step 6: apply the finish coat
The finish coat is the last coat and gives the surface you see. IS 1661 says the earlier coat is damped evenly before the next one goes on (clauses 13.2 and 14.1). Keep the finish coat even in thickness, and smooth it with a float. Round off corners and edges along with the finish, so that no joint marks show later (clause 10.8).
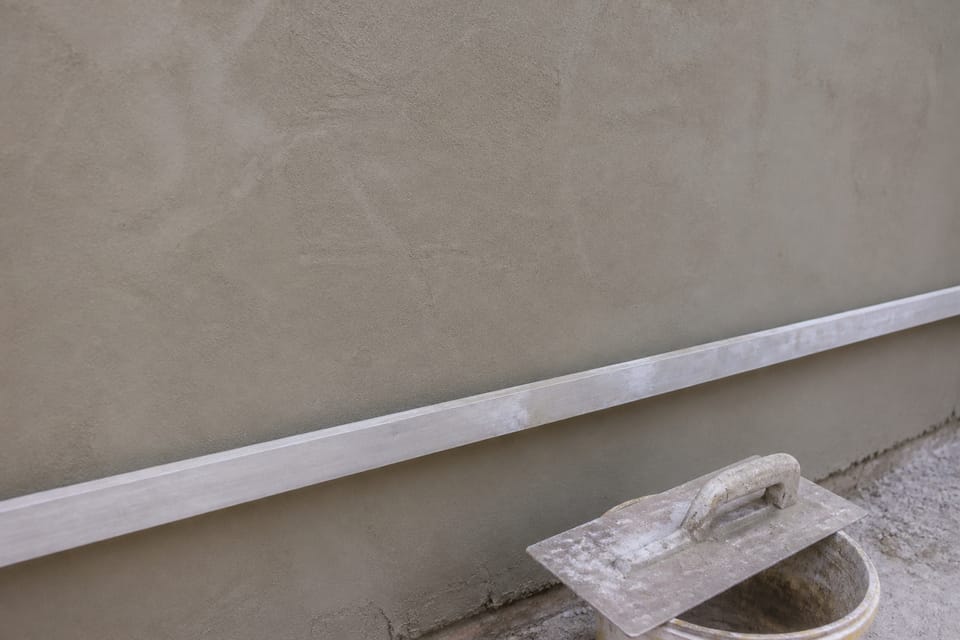
Check the finish across the wall with a straight edge. The standard sets the limit for the tolerance; this page does not repeat the number. Check the corners and the lines too, since the CBRI practice list asks for them to be sharp and free of groove lines.
Step 7: cure the plaster
Curing keeps the plaster damp while it gains strength. IS 1661 says each coat is kept damp continuously until the next coat is applied, or for the maximum period the standard sets (clause 16.1). It also says the finish coat is kept wet for a set period and protected from extremes of temperature and weather (clause 16.2). Start the water as soon as the plaster has hardened sufficiently, and use a fine spray so the surface is not washed out. The curing page explains how and for how long: how long to cure plaster.
The CBRI checklist asks the mason to mark the date when plastering is finished, so that the curing period can be tracked.
What goes wrong, and what the owner can check
| What you see | Usual cause | Check |
|---|---|---|
| A hollow sound when you tap the wall | Loss of bond between the plaster and the wall | Tap across the wall; mark any hollow patch |
| Plaster flaking or peeling off | The wall was not keyed, or it was dusty, smooth or dry | Ask how the surface was prepared |
| Fine hair cracks on the finish | The finish went on before the under coat dried out | Ask when the finish went on |
| Large cracks through the plaster and the wall | Movement in the wall, not the plaster | Ask a structural engineer to look |
| Salt crust (efflorescence) | Plaster on a saturated or salty wall | Do not paint until the wall is dry and the salt is gone |
| Uneven or wavy surface | Weak or uneven under coat; no straight-edge check | Check with a straight edge |
Cracks are covered in more detail on the hairline cracks page.
What mistakes should I avoid?
These are practice points, not standard rules.
- Plastering over dust. Brush the wall first. Dust stops the plaster from bonding.
- Soaking the wall. It is damp, not dripping.
- One thick coat. IS 1661 gives two coats as the ideal where practicable, though clause 7.2.1 notes that single coats have worked on reasonably plane brick. Thick single coats crack more (a practice point, not from the standard).
- Mixing the mortar for the wall with the mix for the plaster. They are different jobs; see the mortar ratio for a brick wall page.
- Painting over a damp or salty wall. Wait until the wall is dry and clean.
- Using loamy, dirty sand. The MPA data sheet says it shrinks and should not be used for plastering. The sand standard and the sand choice are on the plaster quantity page.
Frequently asked questions
Can I plaster a wall myself?
You can, but a first attempt on a large wall is hard to level. Plaster a small patch first, and check it with a straight edge and a tap test.
How many coats of plaster do I need?
IS 1661 gives two coats, an under coat and a finish coat, as the ideal where it is practicable. Rough or lathed backgrounds are listed for three coats or two in the standard’s table (clause 7.2.2), and metal lathing normally needs three (clause 7.2.1). Your mason decides, and the standard’s table gives the count for each background.
What is the difference between cement plaster and gypsum plaster?
They are different materials for different places. The gypsum vs cement plaster page explains the choice.
Do I need to wet a brick wall before plastering?
Yes, to damp, not dripping. A dry absorbent brick takes water out of the plaster.
Related guides
- Plaster quantity: cement and sand per square foot
- How long to cure plaster
- Hairline cracks in plaster
- Exterior wall tiles: how to fix them so they do not fall off
- Plastering terms: punning, screed, dubbing out, hacking and defects
This guide is general information. Read the disclaimer. Your engineer or mason decides the mix, the thickness and the curing for your wall.
Sources
- IS 1661:1972, Code of Practice for Application of Cement and Cement-lime Plaster Finishes (first revision; BIS listing current). Clauses 2.3.4, 2.4.2, 7.2.1, 7.2.2, 8.2.2, 9.3, 9.4, 10.1, 10.4, 10.5, 10.8, 12.1.1, 12.1.2, 12.2.2, 13.2, 15.1, 16.1, 16.2 and 18.2.2 (wording only; numbers not used on this page).
- CBRI, Good Construction Practices (2017), quality-assurance checks for plaster (lines on wetting, holes, under coat, finish and curing date).
- Mortar Industry Association (UK), Data Sheet 10, plastering defects and their causes (used only for the general causes of bond loss and cracking; not an Indian standard).
Change log
- : Added Related guides link to newly published article(s): plastering-terms-explained-punning-screed-dubbing-out-hacking-spatterdash-and-defects. No other text changed. Approved by the reviewing engineer.
- : Added Related guides link(s) to newly published article(s): Exterior wall tiles: how to fix them so they do not fall off. No other text changed.
General information only. It is not a structural design or professional advice. Ask a licensed structural engineer or architect to check your plans and site.